

How to Make Charcuterie with UMAi Dry
UMAi Dry Aging Bags - How to Make Dry Cured Charcuterie
Here is how UMAi Dry Aging Bags work for creating charcuterie at home:

Select and shape the appropriate cut of meat for your project.
For example, pork belly for pancetta, pork shoulder for capicola, or duck breast for duck prosciutto.
To shape, think of what you want the final product to look like, or leave it as is!

Use a digital scale to measure your spices and salts, then combine.
Most recipes use a basic formula:
1. Kosher Salt - 3% of meat (eg. 66 g / 5 lb)
2. #2 Curing Salt- 0.25% of meat (eg. 1 tsp / 5 lb)
3. Spices - Mix your own, or use one of our Spice Blends paired with a Premixed Curing Salts!

Coat the meat with cure and spice blend.
Try to massage it into every nook and cranny.
If you have any spice mix left over, be sure to add it to the bag in the next step.

Seal it in a plastic bag* two weeks to cure.
You can use a Ziplock-style bag, or a vacuum sealed FoodSaver-style bag if you want.
Either way, try to remove as much air as you can before popping it in the fridge.
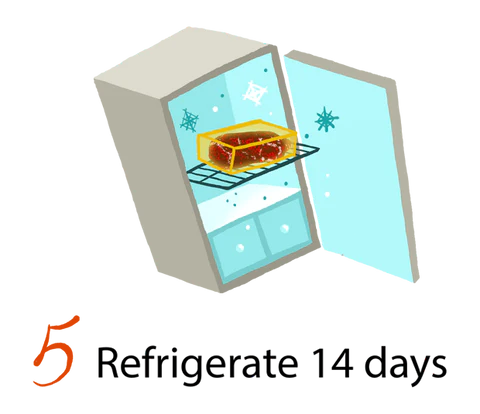
Let it cure in the fridge.
You're halfway done with the hands on part of this project!
This is probably a good time to start planning how you're going to eat it, or share it with friends and family.
Also, check your recipe and read ahead to make sure that you're ready for the next steps.

About a week into the curing process, flip it over.
As the salts and spices work their way into the meat, a bit of moisture is also released into the bag. Use that to your advantage!
It's a good idea to massage the spices around now to make sure that you have even coverage.

After curing, remove from vacuum bag, rinse and get ready to dry.
Make sure that you rinse off all the spices.
You don't want to accidently bite into a solid piece of black pepper or a juniper berry when you're enjoying the final product, right?

Note: Not required for all recipes.
Some recipes can be tied up, like pancetta arrotolata ("rolled", not to be confused with flat pancetta stesa).
And some other recipes, like lomo/lonzino (Spanish/Italian), or basturma, use a coating of spices at this step.
Check your recipe.

Time to start drying!
Seal the cured meat into UMAi Dry, and place on an open wire rack in your fridge for about 1-6 months (Yes... good things take time).
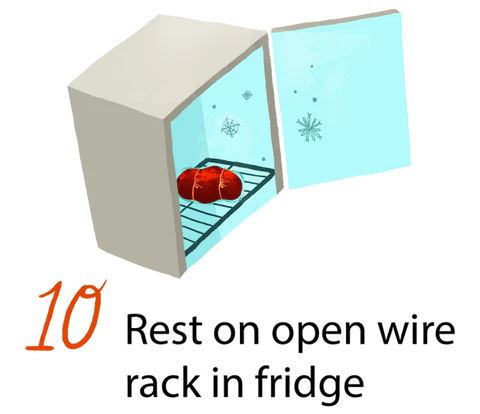
Again, use a wire rack to make sure that air is traveling all around the meat.
Make sure that no part of the meat is touching something else in your fridge, even the walls.
This is very important.

This is the longest and hardest part of the project. Stay strong!
The "hard part" is the waiting!
The actual amount of time required depends on your target weight loss (check your recipe), and a bunch of variables such as ambient humidity, what kind of meat you're drying, how much stuff is in your fridge, etc.
For example, fatty cuts will take longer than leaner cuts because it's harder for moisture to travel through fat than muscle.
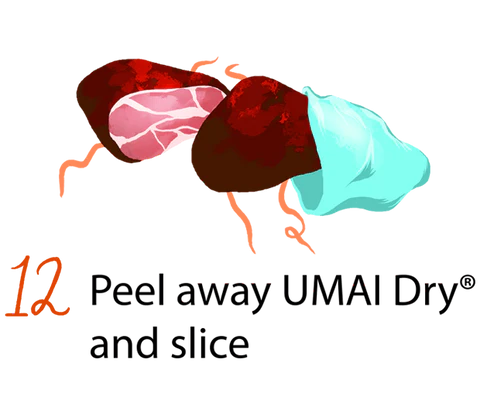
You're done!
That's it, you've done it!
Congratulations, and enjoy your tasty treat!
Slice thin and enjoy with friends and family.
Of course, you can enjoy it on your own, too.
Still have questions?
Trust us, we've seen it all. If you have any questions before, during, or after your project, let us know! We're here to help.